
Looking for more?
Explore our gallery for thousands of high-quality mehndi designs and inspirations.
View Full GalleryHow to Draw Easy Mehndi Designs: Step-by-Step Tutorial for Beginners
Getting Started with Easy Mehndi Designs
When you first look at a fully decorated bridal hand, applying henna can seem impossible. However, every complex pattern is simply a combination of basic shapes. If you are looking for easy mehndi designs to try at home, the best approach is to start small and master the fundamentals.
Learning how to draw simple mehndi designs is a relaxing and rewarding process. You don't need to cover your entire hand to create a beautiful result. A minimalist vine or a single flower on the palm can look just as stunning as a heavy pattern.
In this tutorial, we will walk you through the essential elements of mehndi art and show you how to combine them into beautiful, easy henna designs.
Step 1: Master the Basic Elements
Before attempting a full hand design, practice these four basic elements on a piece of paper or an acrylic practice board.
- Lines and Grids: Practice drawing straight horizontal and vertical lines with consistent pressure. Once comfortable, try crossing them to create a simple grid (or jaal).
- Dots: Dots are the perfect filler. Practice making dots of the same size by gently squeezing the cone and pulling straight up.
- Leaves and Vines: Draw a smooth, curved line (the vine). Then, apply a small dot of henna, press lightly, and drag the tip to create a pointed leaf shape.
- The Basic Flower: Start with a dot in the center. Draw a small circle around it, then add a border of tiny semi-circles (scallops) to create petals.
Step 2: Try a Simple Finger Design
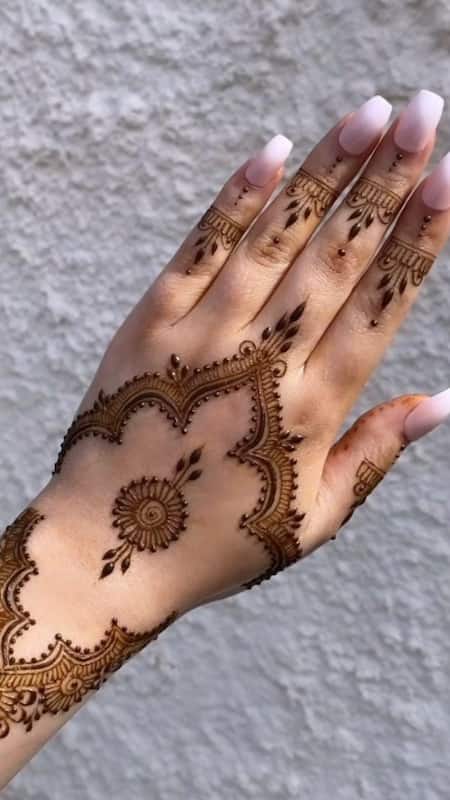
One of the best mehndi designs for beginners is to focus entirely on the fingers. Finger mehndi is incredibly stylish and requires very little time.
How to do it: Start at the base of your index finger. Draw a V-shape pointing toward the tip. Fill the area below the V with a simple grid of lines. Add a few dots at the intersections. Finish the top edge of the V with a row of small scalloped petals. Leave the rest of the hand completely bare for a striking, modern look.
Step 3: The Classic Arabic Vine
If you want to try a slightly larger pattern, an Arabic style floral vine is the perfect choice.
How to do it:
- Start at the base of your index finger and draw a gentle S-curve diagonally across the back of your hand toward your wrist.
- At the center of the curve, draw your basic flower (a dot, a circle, and scalloped petals).
- Add leaves along the remaining parts of the S-curve.
- Finish the design by placing a few descending dots at the very end of the vine near the wrist.
Step 4: The Minimalist Front Hand Mandala
A central mandala is a classic element of front hand mehndi. While intricate mandalas take years to master, a simple version is very achievable.
How to do it: Place a dot exactly in the center of your palm. Draw three concentric circles around it, spacing them slightly apart. Fill the first gap with tiny dots, and the second gap with small diagonal lines. Outline the outermost circle with medium-sized flower petals. You now have a beautiful, perfectly balanced center piece!
Tips for Beginners
- Check your cone: Ensure the tip of your henna cone is cut small enough for fine lines, but not so small that you have to squeeze too hard.
- Rest your hand: Always rest the heel of your drawing hand on the table or the other person's arm to keep your lines steady.
- Clean mistakes quickly: If you make a mistake, quickly wipe it away with a Q-tip (cotton swab) dipped in water before the dye releases into the skin.
- Let it dry: Once you finish your design, let it dry naturally. Do not use a hairdryer, as the heat can melt the paste and ruin your crisp lines.
For more inspiration and a wide variety of patterns to practice, check out our gallery of 25 Simple Mehndi Designs for Beginners.
Frequently Asked Questions
How long does it take to learn mehndi?
You can learn the basic shapes (lines, dots, simple flowers) in a few hours. However, mastering cone control and complex, symmetrical bridal designs takes several months to years of consistent practice.
What is the easiest part of the hand to practice on?
The back of the hand is generally the easiest place for beginners to practice because the skin is tighter and flatter than the palm.
Final Thoughts
The journey to mastering henna art begins with a single dot. By focusing on easy mehndi designs and practicing the foundational elements, you will quickly build the muscle memory and confidence needed to tackle more complex patterns. Remember that even the most famous henna artists started exactly where you are today. Keep practicing, have fun, and enjoy the beautiful process of creating art!

Mehndi Design Henna Editorial Team
Henna Art & Cultural SpecialistsOur dedicated team of professional henna artists, cultural researchers, and beauty enthusiasts curate comprehensive guides, traditional patterns, and modern mehndi trends from around the world.
Browse Related Mehndi Designs
Read Next
How to Make Natural Henna Paste at Home: The Ultimate DIY Guide
An in-depth, comprehensive look at How to Make Natural Henna Paste at Home: The Ultimate DIY Guide. Discover the history, techniques, and modern trends shaping this beautiful art form.
Simple Finger Mehndi Designs: Elegant & Minimalist Patterns for Beginners
Learn how to apply beautiful and simple finger mehndi designs. From delicate rings to climbing vines, explore modern minimalist henna patterns with step-by-step beginner instructions.
25 Easy Mehndi Design Ideas You Can Try at Home (Beginner-Friendly)
Mehndi is a beautiful way to decorate your hands. Discover 25 easy mehndi designs and simple henna patterns that beginners can try at home for weddings and festivals.